Macrame is an artistic form of string knotting, known since antiquity. It was used mainly for creating and decorating various sorts of textiles.
I am introducing one of many applications of macrame technique - a bracelet. More precisely, it will be a shamballa bracelet.
The shamballa bracelet makes use of a basic macrame knot - the flat knot.
It is made in a following way:
For your convenience ("left” string – it is on the left side of the
core
"right” string – it is on the right side of the core)
"right” string – it is on the right side of the core)
1. Fix the string to the frame. It will be the core of our work.We will be braiding our knots around it. The core can also be mounted in other ways, e.g. using a pad with clip, pinning it to a pillow, taping it to a table... - as you can see, there are many ideas on how to do that.
2. Take another string and move it under the core, so that the core will split the string in half of its length. This string has to be long, because it will be used for knotting.
3. Move the "right" string under the core and over the "left" string.
4. Move the "left" string over the core and under the "right" string. In other words, the "left" string goes into the loop made of "right" string.
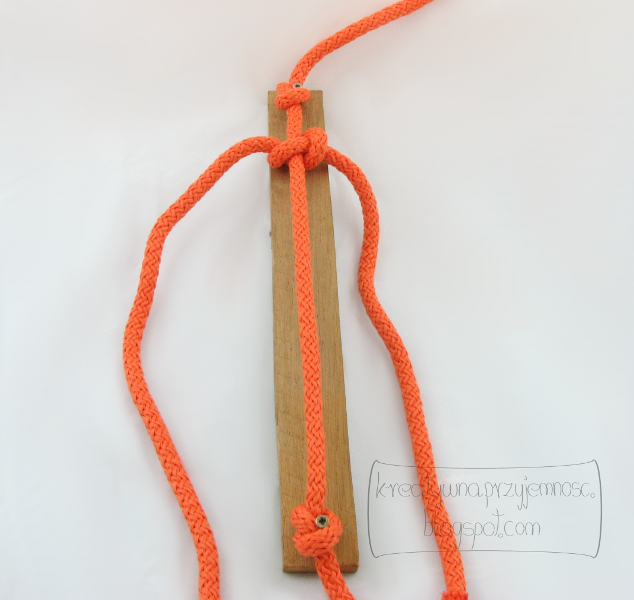
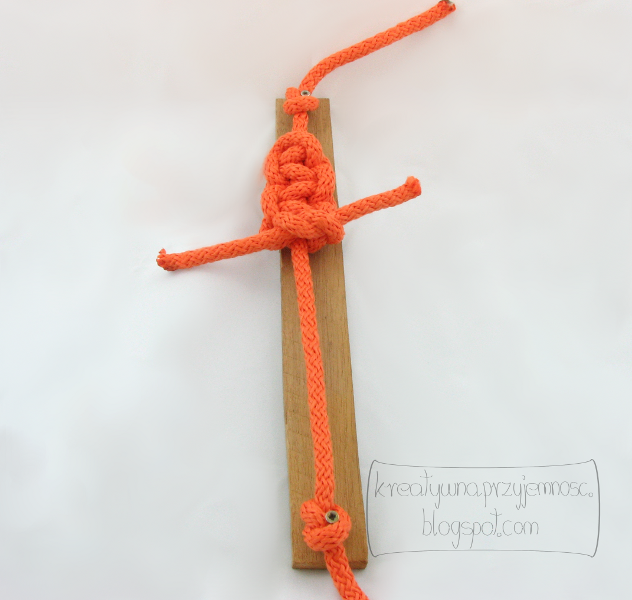
5. Tighten the knot. We have just made a half of the flat knot ! :) This is a little bit different from the next ones, because it is just a beginning of our macrame.
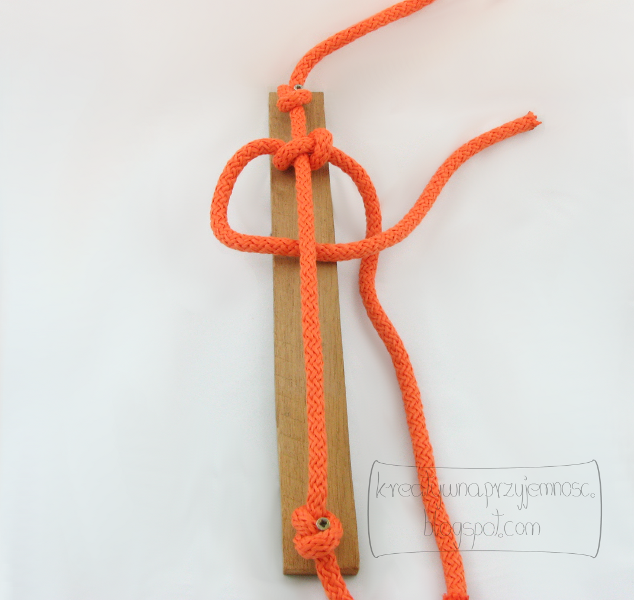
6. Let's move on to the next part of the knot. Now we start at the other side, that is, we do exactly what we did before, but beginning with the string on the right side of the core. The "left" string is moved under the core and over the "right" string.
7. The "right" string is moved over the core and under the "left" string. In other words, we put the "right" string inside the loop formed by the "left" string.
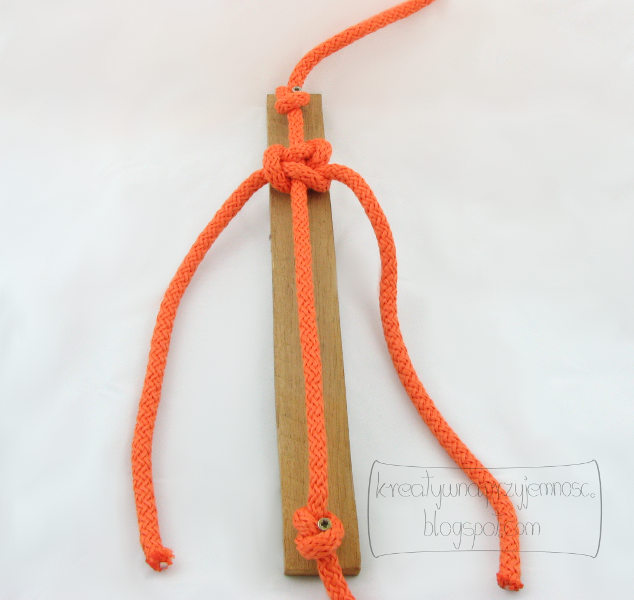
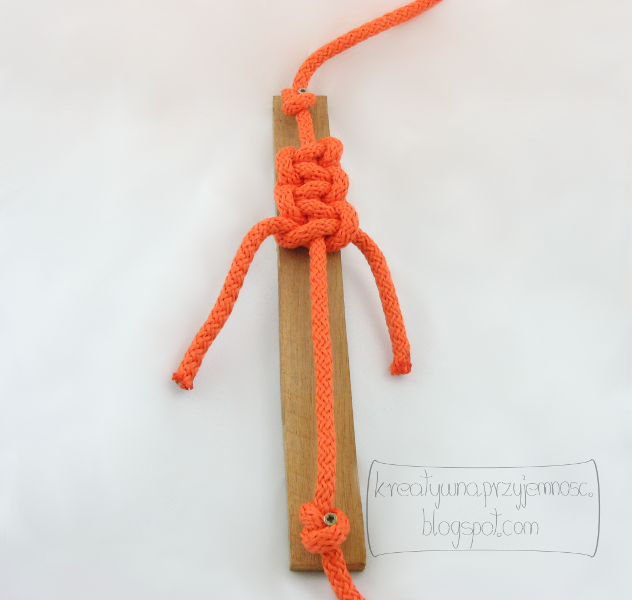
8. Tighten the knot and it is ready! :). Now we repeat the same steps, starting alternately with "right" and "left" string.
9. The "right" string goes under the core and over the "left" string.
10. The "left" string goes over the core and under the "right" string.
11. Tighten the knot.
12. The "left" string goes under the core and over the "right" string.
13. The "right" string goes over the core and under the "left" string.
14. Tighten the knot.
15. The "right" string goes under the core and over the "left" string.
16. The "left" string goes over the core and under the "right" string.
17. Tighten the knot. You can continue these steps until you reach the desired length. Now let's move on to the ending. It is important that the know at the end of the macrame is as little visible as possible. In order to achieve that we will make it on the less visible side.
18. Rotate your work by 180 degrees around the core.
9. Make an ordinary, loose knot. Put a little glue between the knot and the macrame.
20. Tighten the knot with the glue. After the glue has dried cut the endings of the "left" and "right" string. It's ready! :)







Brak komentarzy:
Prześlij komentarz