Welcome to DIY which will tell you how to make a shamballa bracelet.Your work will be similar to the one below:
Shamballa step by step
We will need:
- String - about 210 cm. Split it into 3 pieces (130 cm, 50 cm and 30 cm). I used a piece of cotton waxed string, 1 mm in diameter (for thicker string you may need a slightly longer piece).
- Corals - I used 14 glass beads having 8mm in diameter.
- Small corals, or something equivalent for the ending of the bracelet. I used 6 spacer beads.
- Some way to hold the macrame - there are many ways to hold the macrame. I recommend a slat with two nails.
- Glue - universal glue is good enough.
- Skewer stick - to glue the knots in a handy and precise way.
- Scissors.
Let's start!
As in the previous DIY:
("left" string - is on the left side of the core
"right" string - is on the right side of the core)
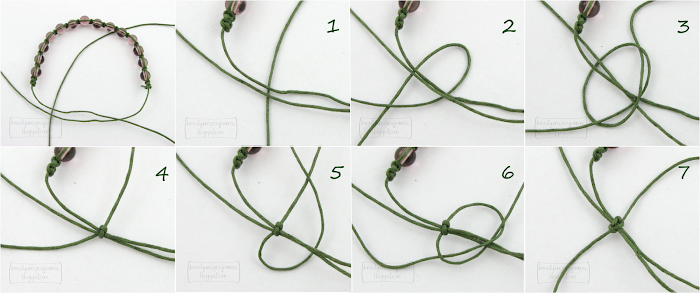
1. Put corals on a piece of string of about 50 cm. Then fix it to the nails. This string will be the core of our work.
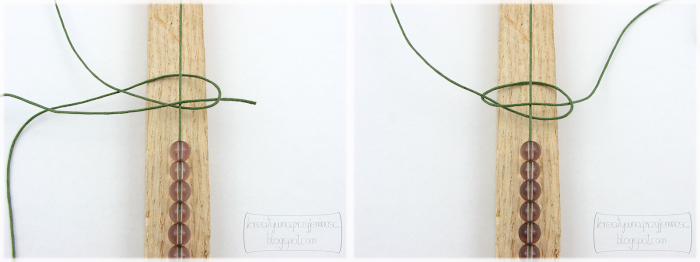
2. Take 130 cm of string and put it under the core so that the core splits the string in half.
3. Put the "right" string under the core and over the "left" string.
4. Put the "left" string over the core and under the "right" string. In other words, the "left" string goes into the loop formed by the "right" string.
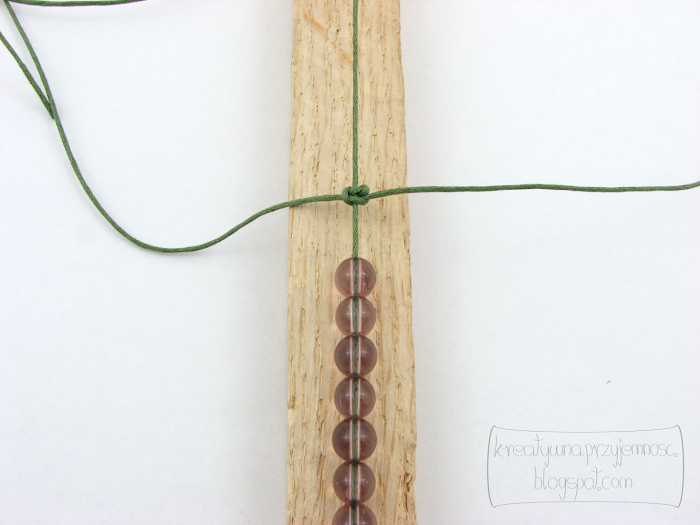
5. Tighten the string.
7. Put the "right" string over the core and under the "left" string.
8. Tighten the string.
9. Repeat steps 3 - 8 in order to create the beginning of the macrame. I repeated the steps one time.
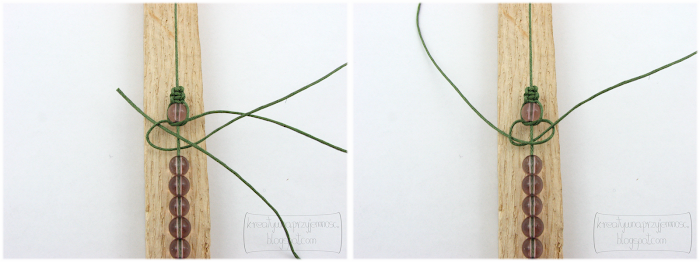
10. Move the coral on the core so that it is adjacent to our knots and do steps 3 - 8.
(3) Put the "right" string under the core and over the "left" string.

(4) Put the "left" string over the core and under the "right" string. In other words, put the "left" string into the loop formed by the "right" string.
(5) Tighten the string.
(6) Put the "left" string under the core and over the "right" string.
(7) Put the "right" string over the core and under the "left" string.
(8) Tighten the string.
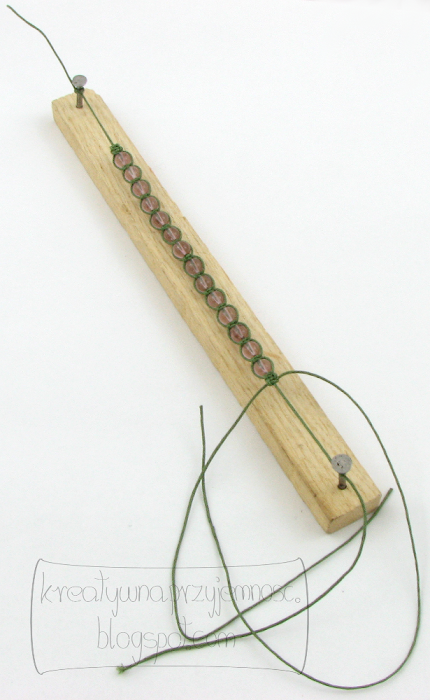
11. We do similar thing with all the corals, that is we repeat the 10th step 13 times.
12. At the end of this part of our bracelet repeat once more steps 3 - 8. This is needed for the bracelet to be symmetric.
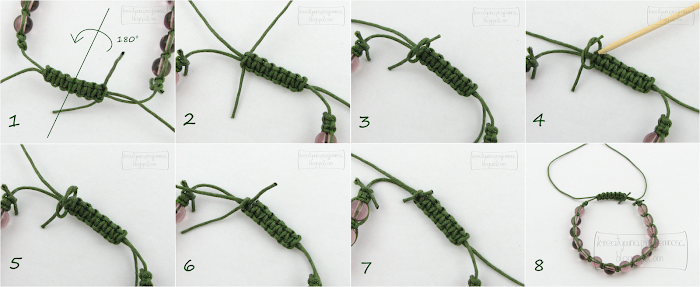
13. Let's proceed to the ending of this part of the bracelet. To this end make the knot and glue it. The knot should not be easily visible. Accordingly we will make it on the other, less visible side. Unfix the work from the nails and rotate it over the core by 180 degrees. Then make an ordinary, loose knot. Put some glue between the knot and the macrame. Tighten the knot. After the glue dries cut the remaining pieces of the "left" and "right" string. I just shortened them a bit.
14. Now we can proceed to the last part of the work on our bracelet, that is, the fastening clasp. Join the two parts of the core so that they are crossed. They now form a new double core. Make ordinary flat knots on this core. Take 30 cm of the string left and put it under the new, double core so that the core splits it in half.
15. Repeat steps 3-8 7 times.
16. Finish as in point 13.
17. Put 3 spacer beads on both ends of the strings being the core. Tie the knot so that the beads will not fall and cut to the preferable length. When the glue dries on all the knots, cut the unnecessary pieces of string from the knots. It's ready :)












Brak komentarzy:
Prześlij komentarz